
How to Fix a Leaking Pipe Joint Before It Causes Water Damage
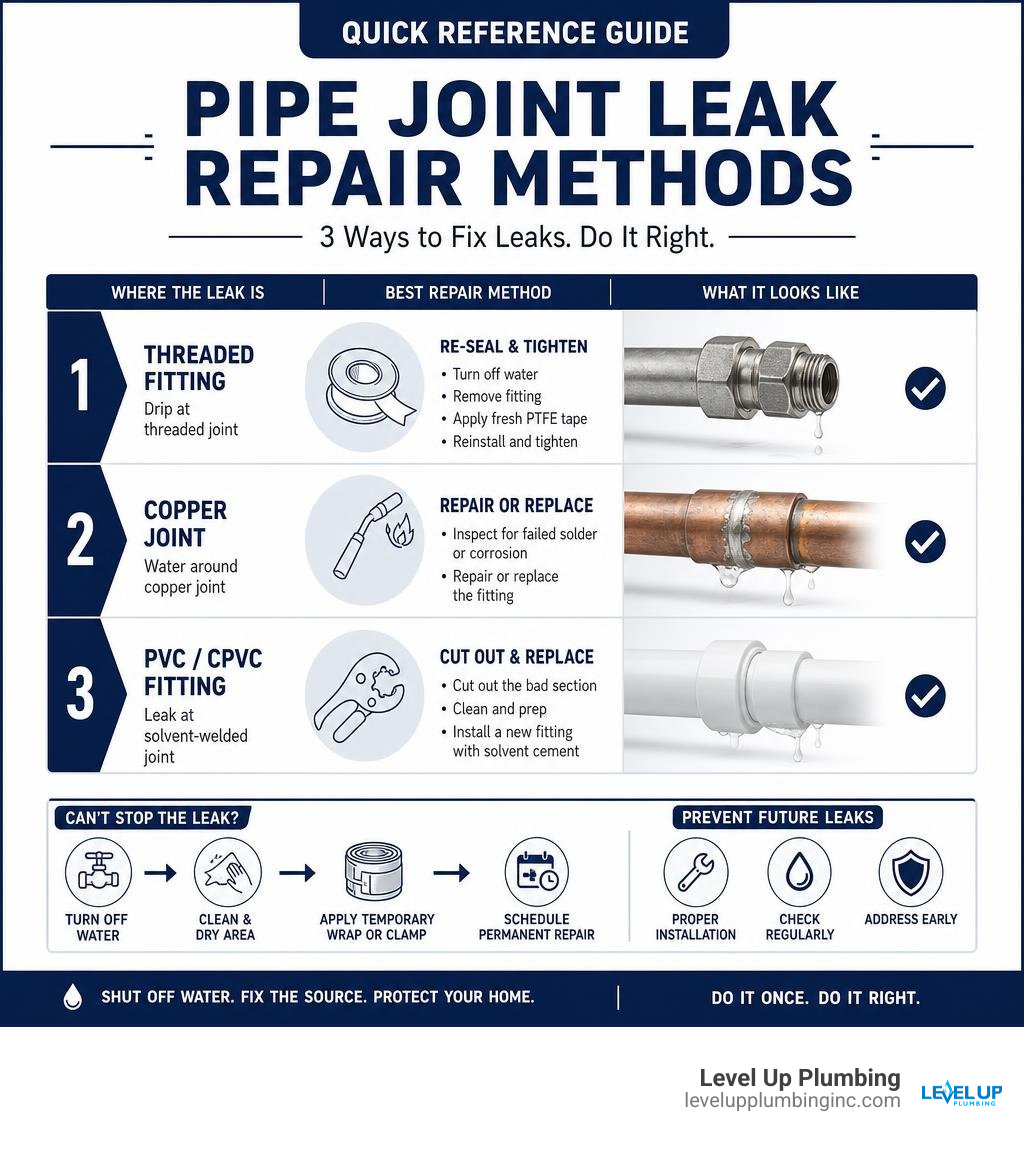
To fix leaking pipe joint problems, first shut off the water, dry the area, and identify the connection type. A loose threaded fitting may only need fresh PTFE tape and proper tightening, while a failed copper, PVC, or PEX joint usually needs a more durable repair or replacement.
| What you see | Likely issue | Best next step |
|---|---|---|
| Drip at threaded fitting | Worn tape, loose or damaged threads | Re-seal and tighten correctly |
| Water around a copper joint | Failed solder or corrosion | Repair or replace the fitting |
| Leak at PVC or CPVC fitting | Failed solvent-welded connection | Cut out and replace the joint |
| Active leak you cannot stop immediately | Emergency water-control need | Use a rated temporary wrap or clamp, then schedule a permanent repair |
A pipe joint can leak because of loose fittings, worn thread sealant, corrosion, poor installation, pressure changes, or movement in the plumbing. Even a slow drip under a sink or behind a wall can damage cabinets, drywall, and floors over time, so it is worth addressing early.
I am Tiffany Miley, owner of Level Up Plumbing, with more than 21 years of experience in Southern California service and trades. I have helped homeowners diagnose and fix leaking pipe joint issues with practical repairs that address the source of the leak, not just the visible water.
Key terms for fix leaking pipe joint:
Diagnosing Pipe Joint Leaks and Pre-Repair Prep
Before jumping straight to applying sealant or grabbing a pipe wrench, you need to properly diagnose where the leak is originating and prepare the pipe surface. In our decades serving Orange County homeowners, we frequently see standard DIY repairs fail simply because water was traveling along the outside of the pipe from somewhere else, or the pipe surface was too dirty for sealants to form a bond.
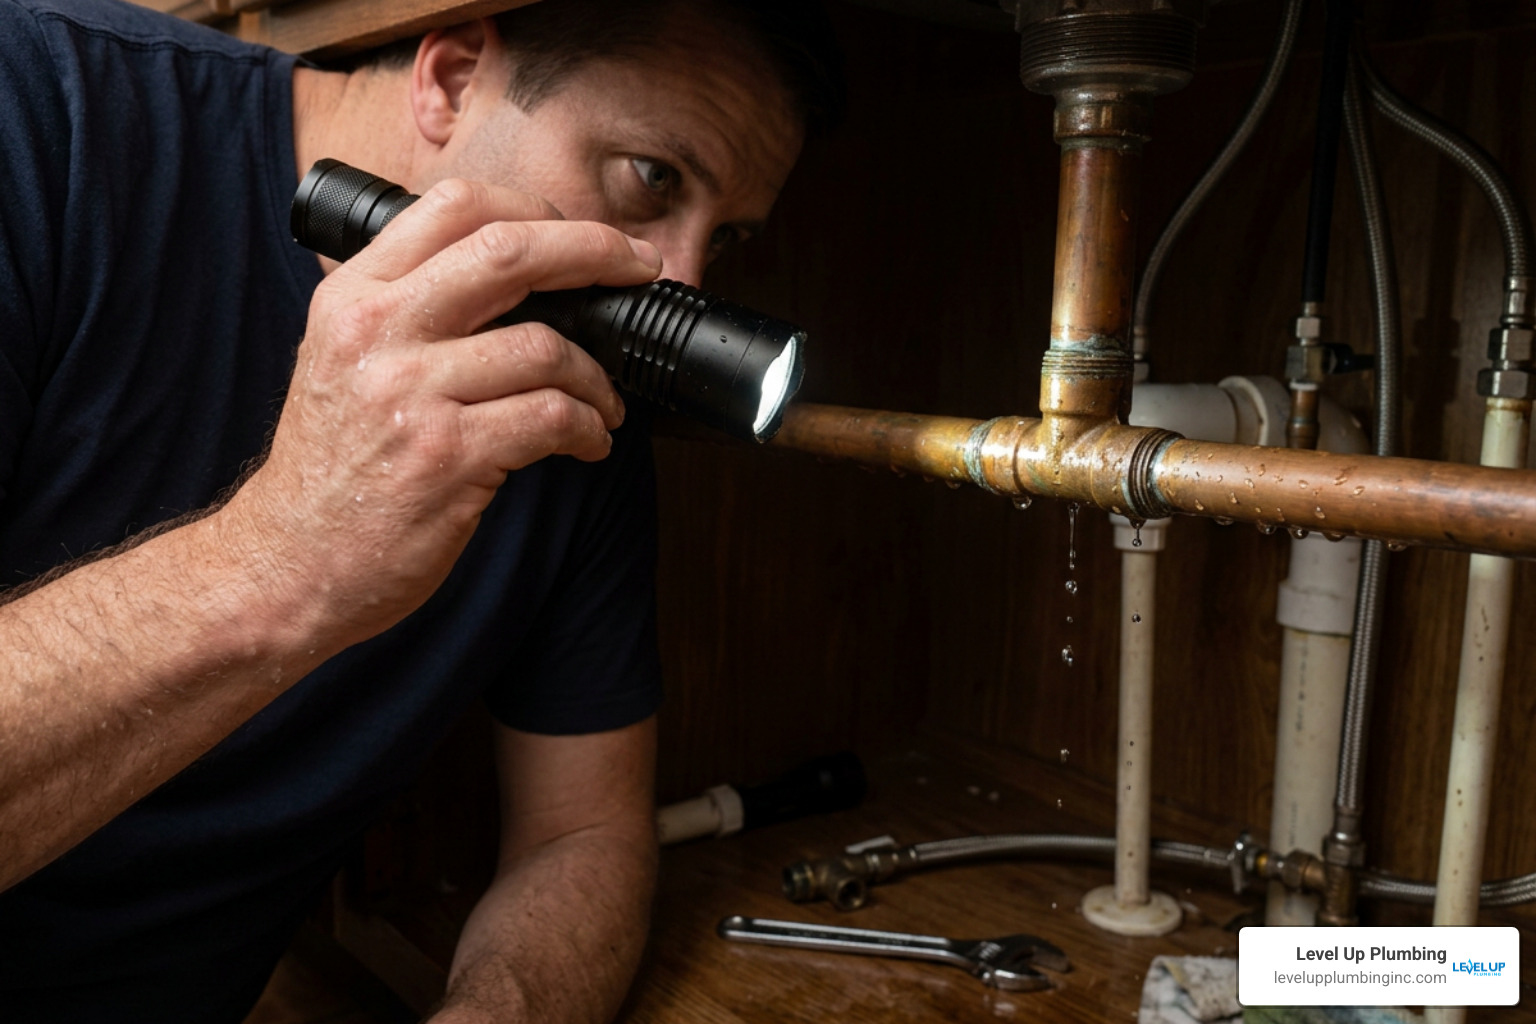
Pinpointing Leak Location vs. Pipe Damage
Water follows the path of least resistance. A drop hanging off the bottom of an elbow fitting under your kitchen sink might actually be coming from a pinhole leak six inches higher up the supply line or from a failing faucet seal above the cabinet deck.
To trace a leak accurately:
- Wipe everything dry: Take a clean rag or paper towel and wipe down the entire length of the pipe, including all adjacent fittings and connections.
- Perform the paper towel test: Wrap fresh, dry paper towels around each joint and along straight pipe sections, securing them loosely with tape.
- Observe the moisture mark: Turn on the water supply or run water down the drain. Look closely to see which paper towel dampens first.
It is equally important to distinguish between a leak occurring at the joint interface versus damage to the pipe wall itself. Joint leaks happen at threaded connections, solder seams, or solvent welds. Pipe damage involves pinhole corrosion, linear cracks, or freeze splits along the pipe body. If you want to dive deeper into handling sudden household drips safely, check out our guide on How to Fix Leak Quickly and Safely at the Same Time.
If you are dealing specifically with under-sink waste lines or P-traps, you can learn more about How to Fix a Leaking Drain Pipe Joint Fast to tackle non-pressurized drainage systems.
Essential Preparation and Surface Cleaning
Whether you plan to thread on fresh sealants, wrap an emergency repair tape, or solder a new copper fitting, initial surface preparation dictates success.
Follow these essential pre-repair preparation steps:
- Shut Off the Water Supply: Locate the local fixture shut-off valve (angle stop) and turn it clockwise until hand-tight. If the shut-off valve is stuck or missing, close your home’s main water shut-off valve.
- Depressurize and Drain the Line: Open the lowest tap or fixture connected to the line to bleed out residual water pressure and drain remaining water into a bucket.
- Clean Away Corrosion and Build-Up: Scrub male and female pipe threads or smooth pipe ends using a stiff wire brush, emery cloth, or steel wool. Remove old plumber’s tape, dried thread compound, rust scale, and mineral deposits.
- Degrease and Dry: Wipe the cleaned metal or plastic pipe surfaces thoroughly with denatured alcohol or isopropyl alcohol. Allow the area to air dry completely. Adhesives, epoxies, and silicone tapes cannot form a mechanical bond on oily or wet surfaces unless specifically formulated to do so under strict conditions.
3 Proven Methods to Fix Leaking Pipe Joint Connections
When evaluating how to fix leaking pipe joint problems in your residential plumbing system, selecting the right technique depends heavily on the pipe material (copper, PVC, CPVC, galvanized steel, or PEX), system operating pressure, and whether you are performing a temporary emergency containment or a permanent structural repair.
| Repair Method | Compatible Pipe Materials | Pressure Capability | Typical Cure / Repair Time | Longevity Rating |
|---|---|---|---|---|
| Thread Sealant (PTFE Tape + Dope) | Threaded Steel, Brass, PVC, CPVC | Standard Residential (40–80 PSI) | Immediate (0 Minutes) | Permanent |
| Emergency Epoxy Putty / Resin Wrap | Copper, Steel, PVC, CPVC, Cast Iron | Up to 60 PSI (Depressurized applying) | 30 to 60 Minutes | Temporary (Emergency Stopgap) |
| Sweat & Solder / Mechanical Fitting | Copper (Sweat); All materials (Push-fit) | Full Line Pressure (>100 PSI) | 15–30 Minutes (plus system drain time) | Permanent |
To learn more about general pipe joint fixes, see detailed guides like How to Fix a Leaking Pipe Joint | 7 Easy Steps (2026) or explore how to handle repairs without pipe cutting via How to Fix a Leaking Pipe Joint in 5 Minutes Without Cutting Pipe.
Method 1: Apply PTFE Tape to Fix Leaking Pipe Joint Threads
Threaded connections on iron, brass, or plastic pipes rely on tapered threads (NPT) to form a mechanical seal. Over time, original thread compounds degrade or temperature fluctuations cause subtle expansion and contraction, resulting in slow seeps.
To re-seal a leaking threaded joint properly:
- Disassemble the Joint: Position two pipe wrenches in opposite directions—one backing wrench to hold the stationary pipe steady, and one active wrench on the fitting coupling. Turn counter-clockwise to unscrew the fitting. Using two wrenches prevents structural stress from cracking adjacent fittings down the line.
- Clean Male and Female Threads: Scrub all metal filings, dirt, and shredded old tape out of both sets of threads using a wire brush and denatured alcohol.
- Wrap PTFE (Teflon) Tape Clockwise: Hold the male pipe end facing you. Start wrapping PTFE tape on the second thread from the end (leaving the lead thread bare so loose tape doesn’t enter the interior water stream). Wrap clockwise 3 to 5 full turns with firm tension. Wrapping clockwise ensures that as you thread the female fitting on, the motion tightens the tape layer rather than unravelling it.
- Apply Pipe Dope (Optional, Recommended): For extra protection on high-pressure water or gas lines, brush a thin, even coat of liquid pipe thread sealant (pipe dope) directly over the wrapped PTFE tape.
- Reassemble and Tighten: Thread the fitting onto the pipe by hand until snug. Finish tightening using your two pipe wrenches. Tighten 1 to 2 full turns past hand-tight. Avoid over-tightening plastic fittings (PVC/CPVC), as excessive force can crack female hub sockets.
Method 2: Emergency Epoxy Putty or Repair Wraps for Active Leaks
When a joint leaks unexpectedly and you cannot immediately shut down the system long enough to perform a full re-pipe or re-solder, modern composite and epoxy products offer outstanding emergency containment.
Products like two-part epoxy putties, self-fusing silicone tapes, composite bandages like Quick Seal Pipe Repair Nu-Calgon, industrial composite kits like LOCTITE® PC 5070 PRO – Henkel Adhesives, and specialty adhesives like How to Repair a Leaking PVC or ABS Pipe Joint With JB Weld can save your floors from devastating water damage. For plastic DWV (drain, waste, vent) systems, specialized repair couplings like the Fernco QwikFix Broken Pipe Coupling Repair Kit for Plastic, Cast Iron and Steel Pipes in Black | Fernco – US offer non-glue mechanical bridging options.
How to apply an emergency composite repair:
- Depressurize line: Turn off the main water valve and drain line pressure. While specialized composite repair systems like LOCTITE PC 5070 PRO can handle live leak sealing up to 60 PSI, depressurizing the pipe always yields the strongest chemical bond.
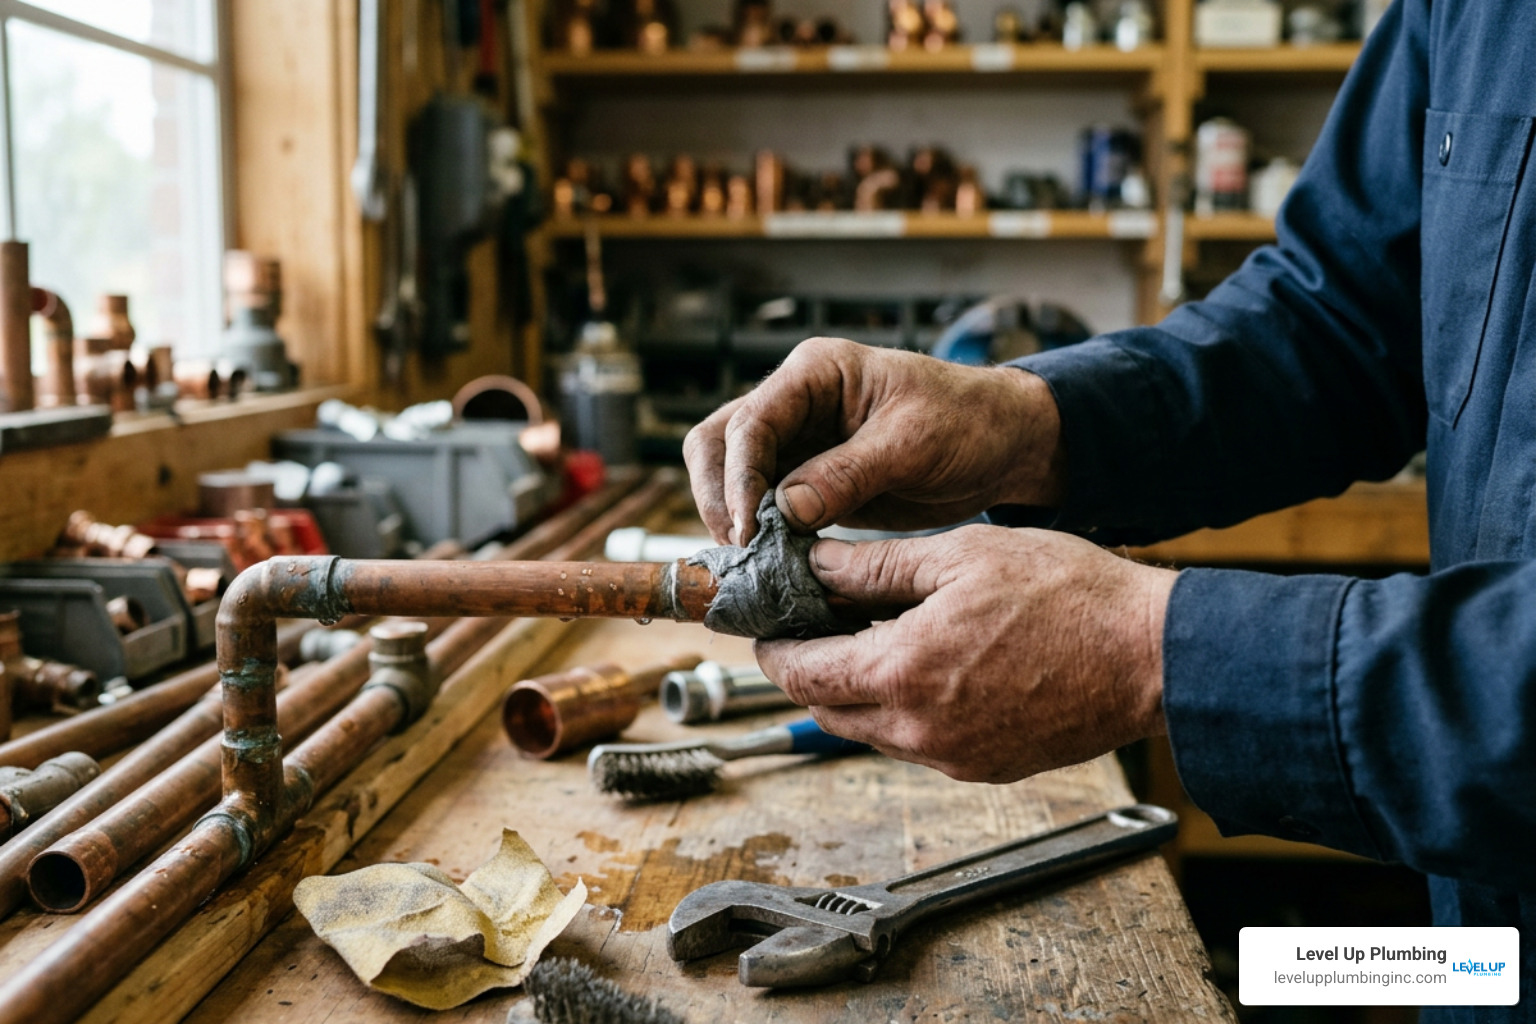
- Abrade the joint: Use 80-grit to 120-grit sandpaper or a file to heavily roughen the surface around the leaking joint seam. Epoxy putties need a textured, cross-hatched surface to anchor into mechanically. Wipe away sanding dust with isopropyl alcohol.
- Apply Epoxy Putty: Cut off equal parts of two-part epoxy stick. Knead thoroughly with gloved hands for 1 to 2 minutes until it becomes a uniform color. Shape the putty into a “snake” or collar and press it firmly into and around the seam of the pipe joint, smoothing it flush. Epoxy putty hardens rapidly and provides a sealed bond in 20 to 60 minutes.
- Wrap Self-Fusing Silicone Tape or Water-Activated Bandage: Stretch self-fusing silicone tape to 300% of its original length and wrap it tightly directly over the joint, overlapping each pass by 50%. Alternatively, submerge a resin-impregnated fiberglass repair bandage in cool water for 20 seconds, then wrap it tightly over the putty, extending at least two inches past both sides of the leak. Smooth the resin back into the fabric weave using wet gloves. These composite resin bandages set rock-hard in under 30 minutes.
Method 3: Sweat and Solder to Fix Leaking Pipe Joint Fittings
For copper water supply lines operating under continuous high pressure, traditional sweating and soldering remains the gold-standard permanent fix. While temporary chemical patches exist, copper lines under thermal stress and internal water pressure require metallic fusing.
To repair or replace a leaking copper joint fitting:
- Drain System Fully: Shut off the water supply and drain all standing water below the repair site. Heat applied to a pipe containing standing water will convert that water to steam, preventing the pipe from reaching the melting point of solder.
- Cut or Sweat Out the Leaking Fitting: Use a tubed pipe cutter to remove the leaking fitting section (cutting approximately 1–2 inches away from the bad joint on each side). Alternatively, heat the old joint evenly with a propane torch until the old solder melts, then pull the joint apart using pliers.
- Clean and Flux Surfaces: Use a wire fitting brush to scrub the interior hub of your new copper coupling or fitting until bright and shiny. Clean the exterior end of the copper pipe with an abrasive pad or emery cloth. Apply lead-free water-soluble soldering flux evenly to both contact surfaces.
- Heat and Apply Solder: Slide the new fitting onto the dry, fluxed pipe. Direct the tip of your propane torch flame onto the center of the fitting hub (not directly on the solder gap). Touch lead-free wire solder to the opposite side of the joint seam. When the copper reaches correct soldering temperature, capillary action will draw liquid solder completely around the internal fitting gap.
- Cool and Inspect: Allow the joint to cool undisturbed for several minutes. Wipe away excess flux residue with a damp rag. Slowly turn the main water back on to verify a leak-free seal.
Temporary vs. Permanent Pipe Joint Repairs
It can be tempting to leave an emergency patch in place permanently once the dripping stops. However, understanding the difference between temporary stopgaps and permanent plumbing fixes is crucial for protecting your property.
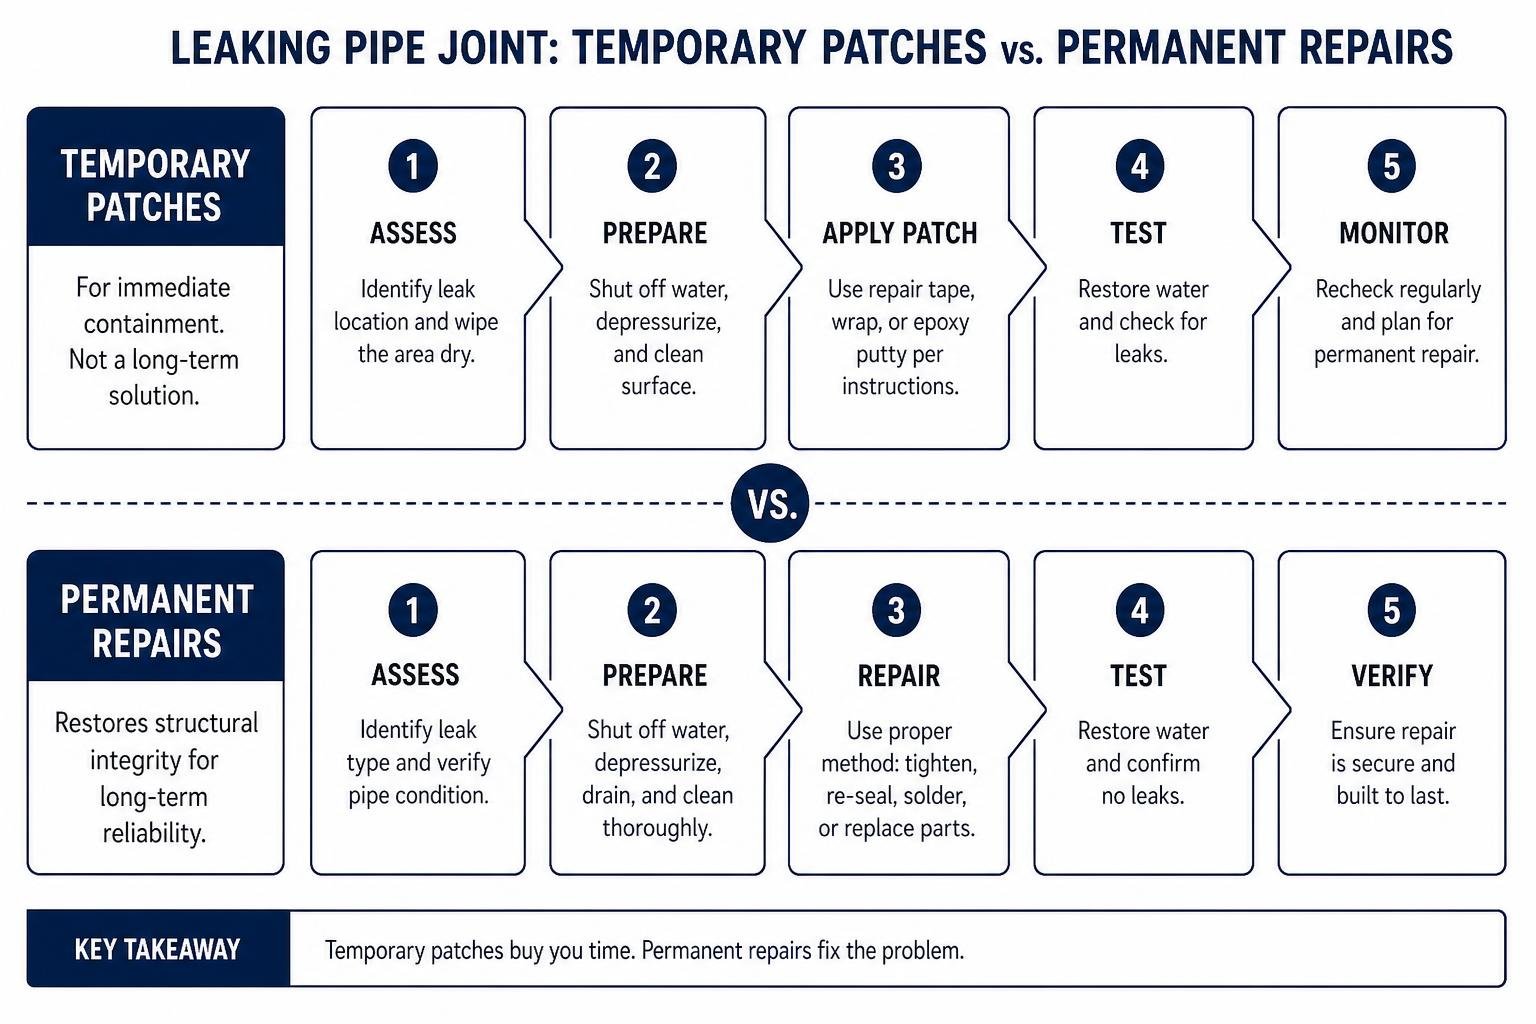
A temporary fix includes solutions like self-fusing silicone tape, rubber patches held by hose clamps, two-part epoxy putties, or composite resin wraps. These products are engineered to stabilize emergency situations, halt active water damage, and hold system pressure briefly until a plumber arrives or you can perform a complete pipe repair.
Because plastic putties and elastomeric tapes do not possess the structural integrity or expansion co-efficients of metal or welded plastic, continuous thermal expansion, water hammer surges, and pressure fluctuations will eventually break the bond, leading to sudden failure.
A permanent fix restores structural integrity equivalent to or exceeding the original installation:
- Threaded Pipes: Full joint disassembly, thread cleaning, and re-application of proper PTFE tape and pipe dope.
- Copper Lines: Fully soldered fittings, press-connect joints, or high-pressure mechanical unions.
- PVC / CPVC: Completely cutting out damaged fittings and solvent welding new fittings with fresh primer and cement.
Leaving emergency patches on pressurized water supply lines inside walls or crawlspaces risks catastrophic blowouts. To avoid plumbing emergencies altogether, review our comprehensive Drain Preventative Maintenance Tips to Keep Your Plumbing Running Smoothly.
When to Call a Professional Plumber
While basic under-sink drain repairs or re-sealing accessible threaded hose bibs are straightforward DIY projects, certain plumbing joint scenarios demand professional expertise. Attempting complex repairs without specialized tools can result in thousands of dollars in water damage or code violations.
You should call a licensed plumber immediately if:
- The leak is hidden inside walls, ceilings, or concrete slabs: In-wall leaks require specialized leak detection tools and structural access experience to prevent unnecessary wall destruction.
- You are dealing with severely corroded galvanized iron lines: Old galvanized steel pipes crumble when torqued with pipe wrenches, often snapping threads off inside walls.
- The joint leak involves main supply water lines or gas lines: Never attempt DIY chemical repairs on natural gas or propane fittings.
- You lack specialized equipment: Torch work in tight spaces surrounded by wood framing presents serious fire risks that require heat shields, fire extinguishers, and proper insurance coverage.
When choosing local assistance, look for verified community reviews such as Plumber recommendations for leak repair in Huntington Beach or explore local plumbing services on directory listings like THE BEST 10 PLUMBING IN HUNTINGTON BEACH, CA.
As a woman-owned business serving Orange County, CA—including Cypress CA, Huntington Beach CA, and Garden Grove CA—Level Up Plumbing brings over 21 years of trusted local expertise and award-winning service to every job. If you ever feel uncertain about tackling a pipe leak safely, remember our simple advice: When in Doubt Call a Plumber.
Frequently Asked Questions About Pipe Joint Leaks
Can I use epoxy putty or tape as a permanent fix for copper pipe joints?
No. Epoxy putty and self-fusing pipe tapes should never be considered permanent repairs on pressurized copper water lines. While epoxy putty can offer a complete emergency seal within 20 to 60 minutes, copper supply pipes experience constant water pressure (40 to 80 PSI) and frequent thermal expansion as hot and cold water cycles through. Over time, the chemical bond between the copper surface and the rigid epoxy will weaken, leading to sudden failure. Soldering a replacement fitting or installing a push-to-connect fitting is required for a lasting fix.
Is it safe to put a repair clamp on an actively leaking pipe joint?
Using a rubber patch and repair clamp directly on an active joint leak is a temporary emergency measure at best. Standard flat repair clamps are designed for straight sections of pipe rather than non-uniform fittings like elbows, tees, or threaded step-ups. Because clamping over an angled joint hub does not allow the rubber gasket to compress evenly, water pressure will usually force its way around the edges of the rubber patch. For active joint leaks, depressurize the system first, apply an activated moldable putty snake around the fitting shoulder, and cover with a water-activated composite resin bandage.
How do I fix a leaking soldered copper joint without replacing the entire pipe?
You do not need to replace entire lengths of copper pipe to fix a single leaking joint. The standard professional method involves turning off the main water, completely draining the line, and cutting out the leaking fitting using a small tubing cutter (removing roughly 1 to 2 inches of pipe on either side). You then clean and flux the pipe ends and slide on a slip-coupling repair fitting. A slip-coupling has no internal stop, allowing you to slide it entirely onto one pipe end, align the pipes, slide the coupling back over the gap, and sweat it in place with a propane torch and lead-free solder in under 15 minutes.
Conclusion
Fixing a leaking pipe joint promptly is one of the most effective ways to protect your home from mold growth, structural rotting, and high utility bills. By identifying whether your leak requires thread re-sealing, an emergency composite patch, or a full soldered repair, you can take control of household plumbing issues safely and effectively.
If you encounter persistent leaks, buried pipe failures, or suspect hidden water damage beneath your home’s foundation, don’t leave your property to chance. Contact our experienced team at Level Up Plumbing today to schedule our specialized Slab Leak Detection & Repair Services or comprehensive leak repairs in Huntington Beach, Cypress, Garden Grove, and across Orange County. We bring 21+ years of trusted local expertise right to your doorstep!