
A Drain Pipe Leaking at Joint Is More Serious Than It Looks
A drain pipe leaking at joint is one of the most common plumbing problems homeowners face — and one of the most easy to underestimate.
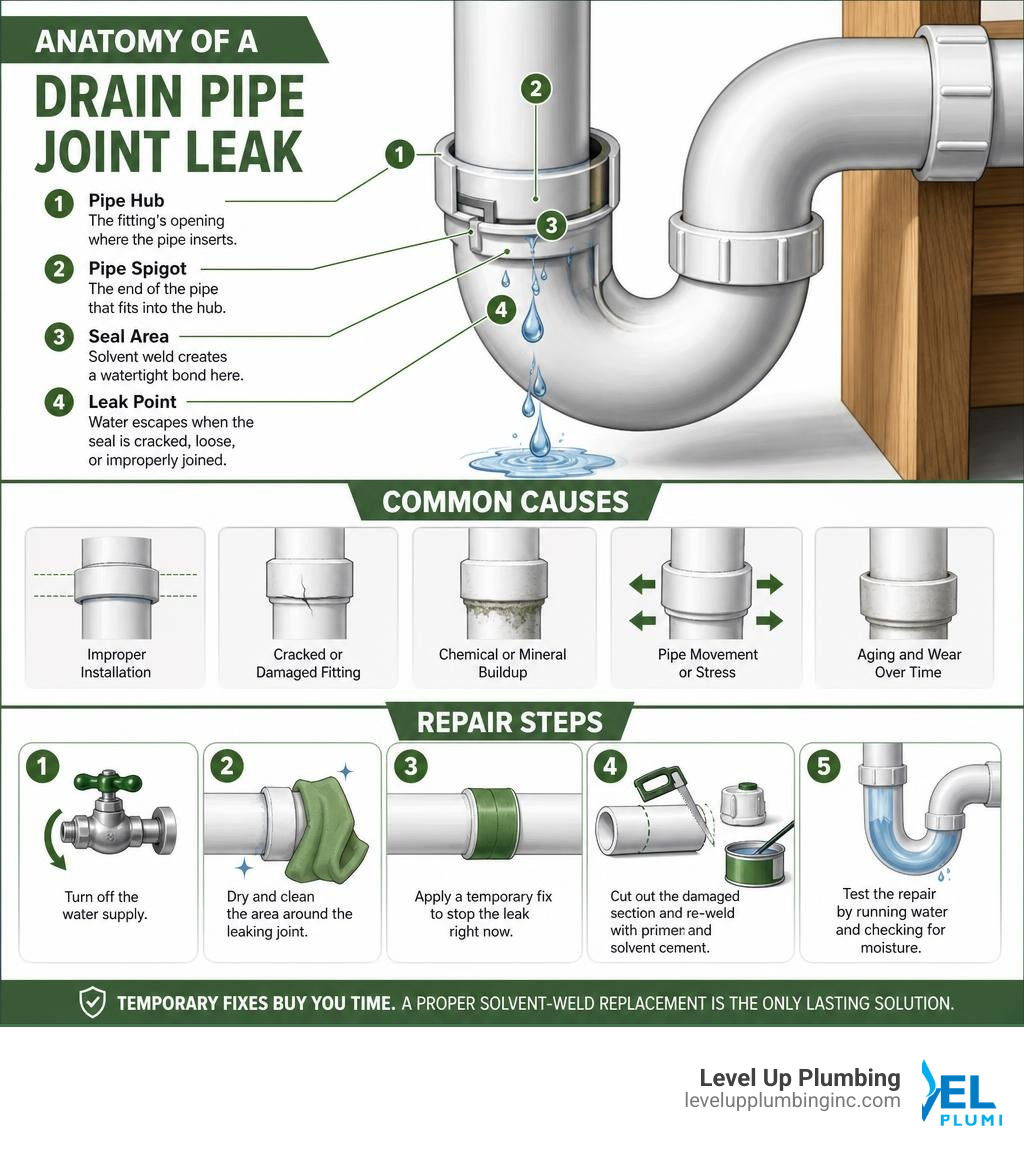
Here’s the quick answer on how to fix it:
- Turn off the water supply to stop the flow.
- Dry and clean the area around the leaking joint.
- Apply a temporary fix (epoxy putty or self-fusing silicone tape) to stop the leak right now.
- Plan a permanent repair — cut out the damaged section and re-weld with PVC primer and solvent cement.
- Test the repair by running water and checking for moisture.
Temporary fixes buy you time. A proper solvent-weld replacement is the only lasting solution for a failed PVC drain joint.
The damage from a leaking joint adds up fast. Water dripping onto wood, drywall, or a cabinet floor creates the perfect conditions for rot and mold — and according to industry data, plumbing leaks cause an estimated $2.5 billion in insurance claims every year across the U.S. What starts as a slow drip under your sink can quietly destroy the cabinet floor, the subfloor beneath it, and the air quality in your home.
The good news? Most drain joint leaks are fixable without replacing your entire pipe run. You just need to know why the joint failed and which repair method actually works.
I’m Tiffany Miley, owner of Level Up Plumbing, and with over 21 years of experience in Southern California’s trades and service industries, I’ve diagnosed and repaired every type of drain pipe leaking at joint you can imagine — from faulty DIY installs to stress cracks caused by years of use. In the sections below, I’ll walk you through exactly how to identify, fix, and prevent this problem for good.
Quick drain pipe leaking at joint definitions:
Diagnosing a Drain Pipe Leaking at Joint
Before you grab your toolbox, you need to find the exact source of the moisture. Water has a sneaky way of traveling along the outside of a pipe, making a leak look like it’s coming from one spot when it actually started several feet away.
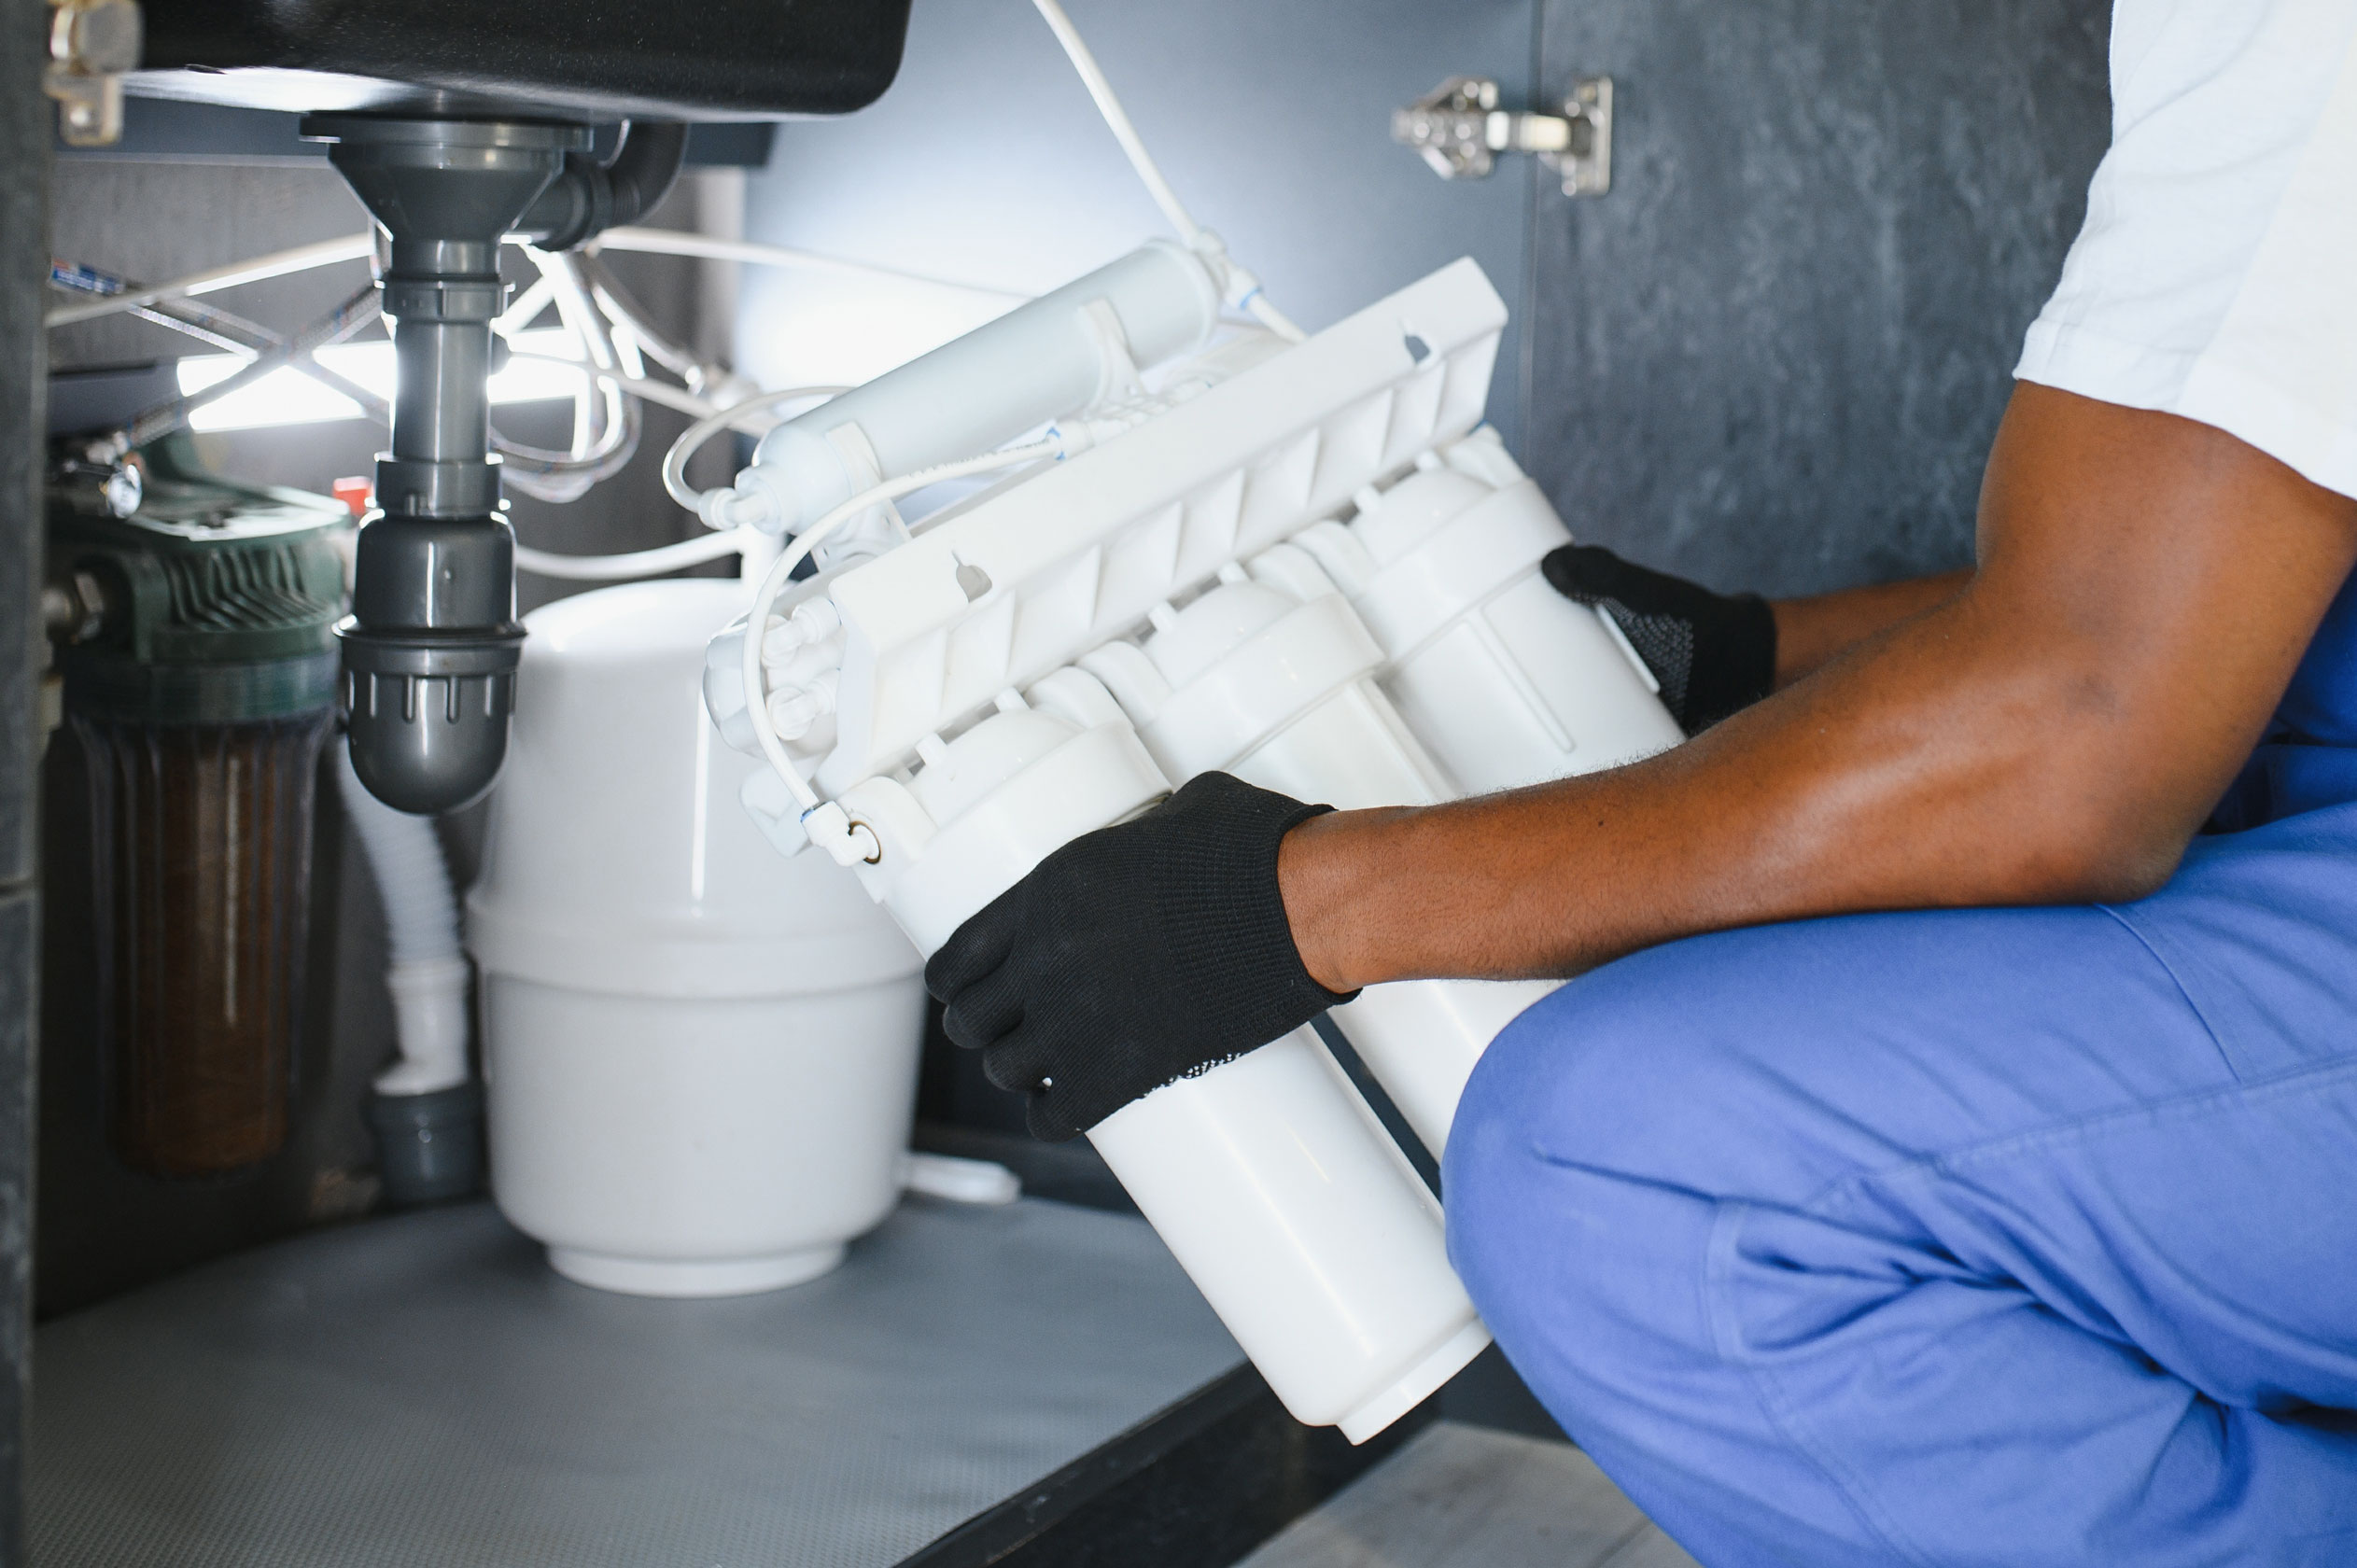
To diagnose the leak, start by completely drying the pipe with a clean rag. Run water down the drain while watching the joint closely. If you do not see active dripping immediately, wrap a dry piece of toilet paper or a paper towel tightly around the joint. If the paper absorbs even a tiny amount of moisture, you have a slow seep.
For broader household leak detection, you can also monitor your water usage or perform municipal checks. If you suspect an issue somewhere deeper in your plumbing system, you can learn more about finding hidden issues from the city resources on How to test for home water leaks.
Common Causes of a Drain Pipe Leaking at Joint
In our 21+ years serving Orange County, CA, we have found that PVC and ABS drain joints typically fail due to one of four main reasons:
- Improper Installation (The “Dry Joint”): This is the single most common culprit. A proper plastic pipe connection requires both a primer and solvent cement. If the original installer skipped the primer or didn’t use enough cement, the joint may hold temporarily but will eventually separate under thermal stress.
- Stress Cracks: Over time, structural shifting, heavy vibrations from garbage disposals, or overtightened pipe hangers can put mechanical stress on plastic joints. This leads to hairline fractures directly along the seam of the fitting.
- Downstream Clogs: When a drain line develops a partial blockage downstream, wastewater backs up. This creates static pressure inside a pipe system that was only designed to handle gravity-fed, non-pressurized flow. The backed-up water forces its way out of the weakest point—usually an older, slightly weakened joint.
- Worn Gaskets and Washers: In slip-joint connections (like the adjustable P-traps found under kitchen and bathroom sinks), the rubber or plastic washers degrade, dry out, and lose their elasticity over time.
If your leak is located in your bathroom fixtures rather than under-sink cabinet pipes, you may want to read our specialized guide on How to Fix a Bathtub Drain Leak When Closed to pinpoint the exact failure point.
Identifying Installation Errors vs. High Water Pressure
It is crucial to distinguish between a localized drain installation error and a system-wide water pressure issue.
While drain lines themselves are not pressurized, high water pressure (above 80 PSI) in your home’s main water supply lines can cause water hammer. This sends violent shockwaves through your walls every time a faucet or valve shuts off, physically rattling and weakening your drain joints over time.
To determine if your leak is an installation error, look for these visual clues:
- Missing Purple Primer: If your PVC pipes do not show a faint purple ring around the edge of the fitting, the installer likely skipped the primer. Primer chemically softens the plastic so the solvent cement can fuse the pieces together. Without it, the joint is just glued, not welded.
- Insufficient Pipe Insertion: If the pipe was not pushed fully into the hub of the fitting during installation, the joint will be incredibly weak and prone to leaking.
- Crusty White or Green Deposits: On metal or threaded joints, these mineral deposits indicate a slow, long-term weep caused by dried-out thread sealant or a loose connection.
If you are dealing with an active water leak and need to minimize damage immediately, check out our emergency checklist on How to Fix Leak Quickly and Safely at the Same Time.
How to Fix a Leaking PVC Joint: Temporary vs. Permanent Methods
When dealing with a drain pipe leaking at joint, you have two paths forward: a quick temporary patch to keep your kitchen or bathroom functional, or a permanent replacement.
| Repair Method | Expected Longevity | Complexity | Best Used For |
|---|---|---|---|
| Self-Fusing Silicone Tape | Days to Weeks | Very Low | Emergency containment, non-pressurized lines |
| Two-Part Epoxy Putty | Weeks to Months | Low | Small cracks or pinholes in hard-to-reach areas |
| Slip-Joint Washer Replacement | Years | Medium | P-traps and under-sink adjustable drains |
| Solvent Welding (Cut & Replace) | Decades (Permanent) | High | Glued PVC/ABS main drain lines |
Temporary Fixes for a Drain Pipe Leaking at Joint
If you cannot replace the damaged section of pipe immediately, you can use temporary sealants to stop the drip. However, you must prepare the surface correctly, or the patch will slide right off.
- Self-Fusing Silicone Tape: This specialized tape does not use traditional adhesive. Instead, it chemically fuses to itself when stretched and wrapped tightly. To apply it, dry the pipe completely. Start wrapping the tape two inches before the joint, stretching it to double its length as you wrap, and overlap each turn by 50%. Finish wrapping two inches past the leak.
- Two-Part Epoxy Putty: Epoxy putty is excellent for sealing hairline cracks on the surface of a joint. Cut off a slice of the putty and knead it in your hands until the inner and outer layers merge into a uniform color. Press the putty firmly over and around the leaking seam. It will harden like steel in about 20 minutes.
For a detailed walkthrough of using industrial-strength epoxies, you can check out this guide on How to Repair a Leaking PVC or ABS Pipe Joint With JB Weld. While epoxy is incredibly strong, it is still considered a temporary patch on PVC because it does not chemically fuse the two sliding plastic parts together.
The Permanent Repair: Step-by-Step Solvent Welding
For glued PVC drain lines, the only true permanent fix is to cut out the failed joint and install a new fitting using solvent welding. PVC cement is not glue; it is a chemical solvent that melts the plastic surfaces, fusing them into a single, solid piece of plastic.
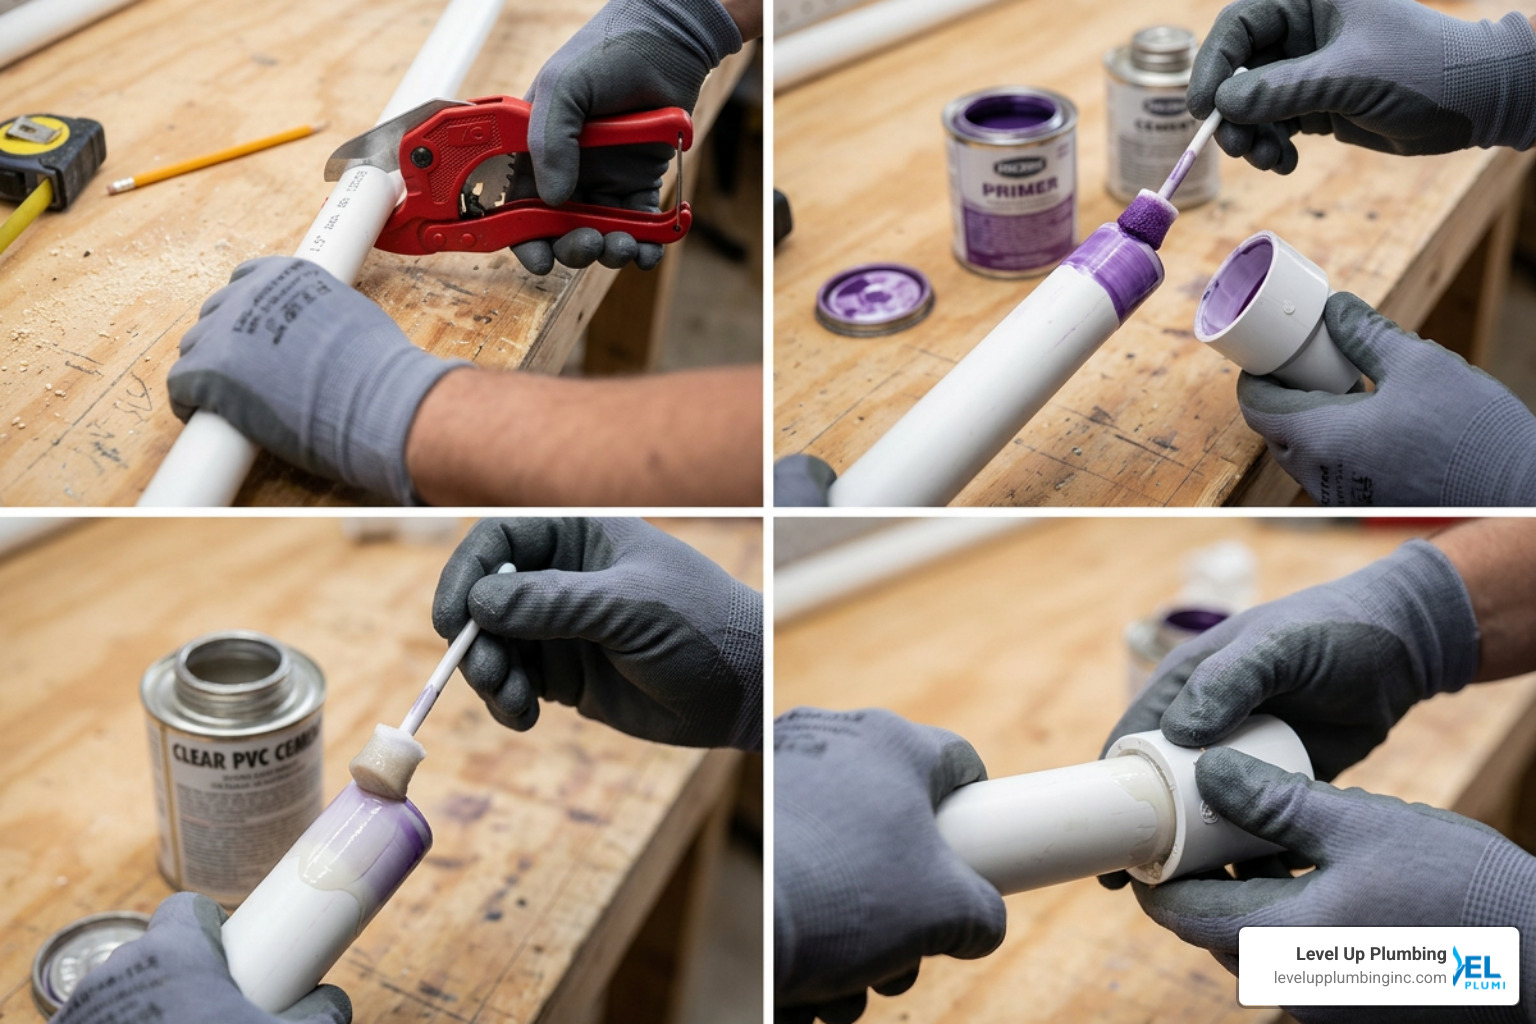
Here is how to do it correctly:
- Shut Off the Water: Turn off the water supply and run the faucets to drain any remaining water from the system.
- Cut Out the Failed Joint: Use a hacksaw or a ratcheting PVC pipe cutter to cut the pipe at least two inches away from the leaking joint on both sides. Ensure your cuts are perfectly straight and perpendicular to the pipe.
- De-burr and Clean: Use a utility knife or emery cloth to remove all plastic burrs from the cut ends. Wipe the pipe clean of any moisture, dirt, or grease.
- Dry Fit the Pieces: Cut a new section of pipe to match the gap and dry-fit it with your new couplings and fittings. Mark a alignment line across the joints with a marker so you can align them perfectly during final assembly.
- Apply Primer: Apply purple PVC primer to the outside of the pipe ends and the inside hubs of the new fittings.
- Apply Solvent Cement: While the primer is still wet, apply a thin, even layer of PVC cement to the inside of the fitting hub and a generous layer to the outside of the pipe end.
- Join and Twist: Quickly push the pipe into the fitting until it bottoms out, giving it a quarter-turn twist to distribute the cement evenly. Align your marker lines.
- Hold Firmly: Hold the joint together tightly for at least 30 seconds. Because of the tapered design of PVC fittings, the pipe will try to push itself back out before the cement sets.
- Cure and Test: Wipe away any excess cement. Allow the joint to cure for at least two hours (ideally 24 hours) before running water through the line.
For additional professional tips on handling solvent welds safely, refer to the step-by-step instructions in How to Fix a Leaking PVC Drain Pipe Joint – Engineer Fix.
Tools, Costs, and Prevention Strategies
Having the right tools on hand makes the difference between a quick, successful repair and an emergency trip to the hardware store with water pooling on your floor.
Required Tools and Materials Checklist
If you are planning to tackle a drain pipe leaking at joint yourself, gather these essential supplies:
- Ratcheting PVC pipe cutter or a fine-tooth hacksaw
- Purple PVC primer and solvent cement (matched to your pipe material: PVC or ABS)
- Emery cloth or 120-grit sandpaper (for de-burring and cleaning)
- Replacement PVC fittings (couplings, elbows, or a slip-fix repair coupling)
- Clean, dry cotton rags
- Safety glasses and chemical-resistant gloves
- Teflon tape and non-hardening pipe joint compound (for threaded joints)
For a complete checklist of tools and step-by-step safety guidelines, you can review How to Fix a Leaking Pipe Joint | 7 Easy Steps (2026).
Cost Comparison: DIY vs. Professional Repair
Choosing between a DIY fix and hiring a licensed plumber comes down to your comfort level, the location of the leak, and your budget.
- DIY Repair: If you already own basic tools like a hacksaw, the cost of materials (primer, cement, and a few fittings) is very minimal. It is an incredibly cost-effective option for highly accessible pipes, such as those under a kitchen sink.
- Professional Repair: Hiring a professional plumber involves labor costs, but it guarantees the job is done right the first time. Professionals carry specialized diagnostic equipment, use commercial-grade materials, and offer warranties on their work.
- The Cost of Inaction: Ignoring a slow drip to save money is a costly mistake. Over time, a minor leak can lead to thousands of dollars in water damage remediation, structural floor rot, and professional mold removal.
How to Prevent Future PVC Joint Leaks
The best way to deal with a plumbing leak is to prevent it from ever happening in the first place. Use these pro-tips to keep your waste lines running smoothly:
- Support Your Pipes: Ensure all horizontal drain lines are properly supported with pipe hangers every 4 feet to prevent sagging and structural stress on the joints.
- Avoid Harsh Chemical Drain Openers: Acidic, store-bought chemical drain cleaners generate intense heat inside your pipes. This heat can warp plastic pipes and degrade the solvent-welded joints, leading to premature failure.
- Align Joints Perfectly: When installing or repairing pipes, never force a pipe into a fitting at an angle. Forcing misaligned pipes puts constant mechanical tension on the joint, which will eventually cause it to crack.
- Practice Regular Maintenance: Keep your drains clean and clear of hair, grease, and food debris to prevent the pressure buildup caused by downstream clogs.
For more expert advice on maintaining your home’s waste lines, explore our comprehensive guide on Drain Preventative Maintenance Tips to Keep Your Plumbing Running Smoothly.
Frequently Asked Questions about Drain Pipe Leaks
When should I call a professional plumber instead of attempting a DIY fix?
You should skip the DIY route and call a licensed plumber if:
- The leaking joint is located inside a wall, ceiling, or concrete slab.
- The pipes are made of older materials like cast iron or galvanized steel, which require specialized cutting and joining tools.
- You notice signs of extensive structural water damage or active mold growth.
- You have attempted a DIY repair and the joint continues to seep or drip.
Can high water pressure cause a drain pipe joint to leak?
Yes, indirectly. While drain lines themselves are gravity-fed and do not hold pressurized water, high household water pressure (above 80 PSI) causes “water hammer.” These physical vibrations shake and weaken your drain pipe supports and joints over time, eventually causing them to fail. Additionally, if a drain line is clogged, municipal water entering the drain under high pressure can back up quickly, putting static pressure on weak joints.
What is a cleanout and how does it help diagnose leaks?
A plumbing cleanout is an accessible pipe with a removable cap that provides direct access to your main waste lines. It allows plumbers to insert cameras or drain snakes to clear major blockages. If you have a recurring leak at a drain joint, opening the cleanout can help determine if a downstream clog is causing wastewater to back up and stress the joint.
To learn more about finding and using this crucial fixture, read our detailed article explaining What is a Cleanout.
Need Help? Let Orange County’s Trusted Experts Handle It
While fixing a simple under-sink slip joint is a highly manageable DIY project, dealing with main waste lines, hidden leaks, or structural water damage is a completely different story.
If you are dealing with a stubborn drain pipe leaking at joint in Huntington Beach, CA, Cypress, CA, Garden Grove, CA, or anywhere in Orange County, our team at Level Up Plumbing is here to help. As a proud, woman-owned local plumbing company with over 21 years of hands-on expertise, we pride ourselves on providing award-winning customer service and permanent, code-compliant repairs.
Don’t let a small drip turn into a major water damage headache. Schedule a Slab Leak Repair in Huntington Beach or contact us today to get your home’s plumbing running smoothly again!