
Why a Worn Flush Seal Wastes More Water Than You Think
Flush seal replacement is one of the most common — and most overlooked — toilet repairs a homeowner can do.
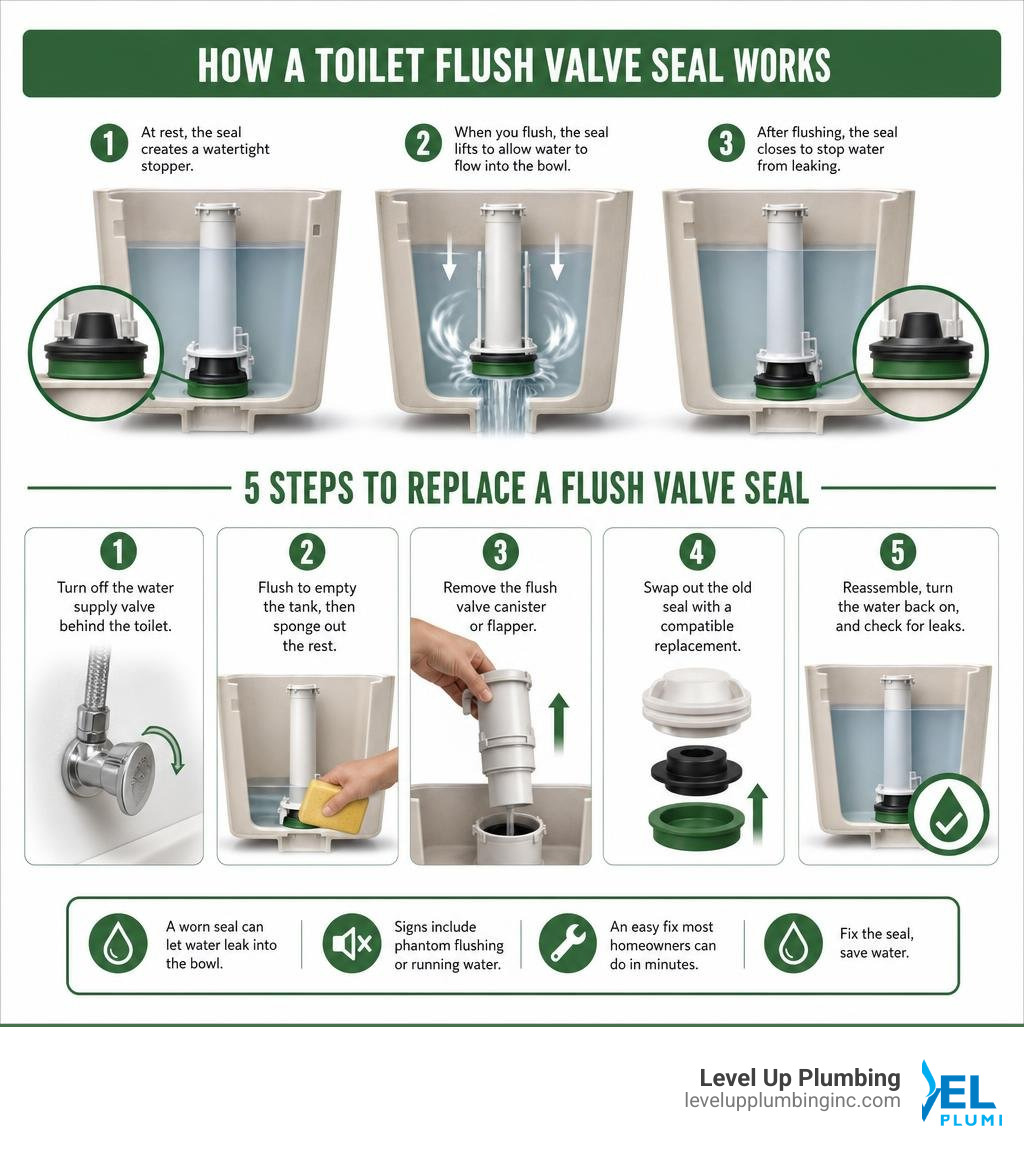
Here’s the quick answer:
- Turn off the water supply valve behind the toilet.
- Flush to empty the tank, then sponge out the rest.
- Remove the flush valve canister or flapper.
- Swap out the old seal with a compatible replacement.
- Reassemble, turn the water back on, and check for leaks.
That’s the short version. The full guide below walks you through each step in detail.
A leaking toilet might seem like a small annoyance, but a worn flush valve seal can silently waste hundreds of gallons of water every month. You may not even hear it — just a faint trickle, or a toilet that refills on its own out of nowhere. That “phantom flush” is a telltale sign the seal at the bottom of your tank has given out.
The good news? This is a repair most homeowners can handle in under 30 minutes with basic tools.
I’m Tiffany Miley, owner of Level Up Plumbing in Huntington Beach, and with over 21 years of experience in Southern California’s plumbing and trades industry, I’ve seen flush seal replacement come up again and again as one of the easiest fixes homeowners put off the longest. Let’s change that.
Common flush seal replacement vocab:
What is a Flush Valve Seal and Why Does It Fail?
Inside your toilet tank sits a mechanism called the flush valve. When you press the flush handle, it lifts either a flexible toilet flapper or a plastic canister tower. This action allows the water stored in the tank to rush down into the bowl to initiate the flush.
At the very bottom of this flush valve assembly is a circular gasket called the flush valve seal. This seal is responsible for creating a watertight barrier between the tank and the bowl. When the toilet is idle, the seal must remain perfectly airtight to keep water from slowly draining out.
Unfortunately, these seals do not last forever. In fact, standard industry guidelines suggest that flush valve seals are standard maintenance items that should be replaced every 2 years. Several factors contribute to their failure:
- Chlorine and Chemical Damage: Municipal tap water contains chlorine and chloramines to keep it safe for drinking. However, these harsh chemicals slowly break down the rubber or silicone compounds in your toilet seals. This chemical decay is accelerated if you use drop-in chemical cleaning tablets inside your tank, which can warp, shrink, or dissolve rubber parts in a matter of months.
- Hard Water and Mineral Buildup: Here in Orange County, CA, we are no strangers to hard water. Calcium, magnesium, and other mineral deposits can accumulate around the flush valve seat and the seal itself. This rough buildup prevents the seal from seating flatly, creating microscopic gaps where water can seep through.
- Physical Wear and Age: Over years of constant compression and lifting, the seal loses its elasticity, develops tiny cracks, or becomes misshapen.
Understanding the mechanics of your toilet tank is the first step toward diagnosing issues before they lead to water damage. To brush up on your DIY plumbing knowledge, check out our guide on How to Fix Toilet Problems Fast by Using Simple Tools.
How to Know If You Need a Flush Seal Replacement
Detecting a bad flush valve seal isn’t always as obvious as spotting a puddle on your bathroom floor. Because the water leaks directly from the tank into the toilet bowl, the evidence remains entirely self-contained.
The most common warning signs include:
- The “Phantom Flush”: You are sitting in your living room in the middle of the night, and suddenly the toilet tank turns on and runs for 10 seconds before shutting off. This happens because water has slowly leaked past the flush seal, lowering the tank’s water level enough to trigger the fill valve to top it back off.
- An Unusually High Water Bill: If your water bill spikes unexpectedly, a leaking toilet seal is often the prime suspect. A minor, barely audible leak can waste up to 200 gallons of water per day.
- A Continuous Running or Hissing Sound: If you hear a constant trickle of water or a low-frequency hissing noise coming from the toilet, the fill valve is constantly working to replace water that is slipping past a degraded seal.
If you are dealing with a running toilet, you can read our quick walkthrough on How to Fix a Leaking Toilet Valve in 5 Quick Steps for a fast diagnostic check.
Signs You Need a Flush Seal Replacement
The easiest way to confirm that your flush valve seal is leaking is to perform a simple food coloring test.
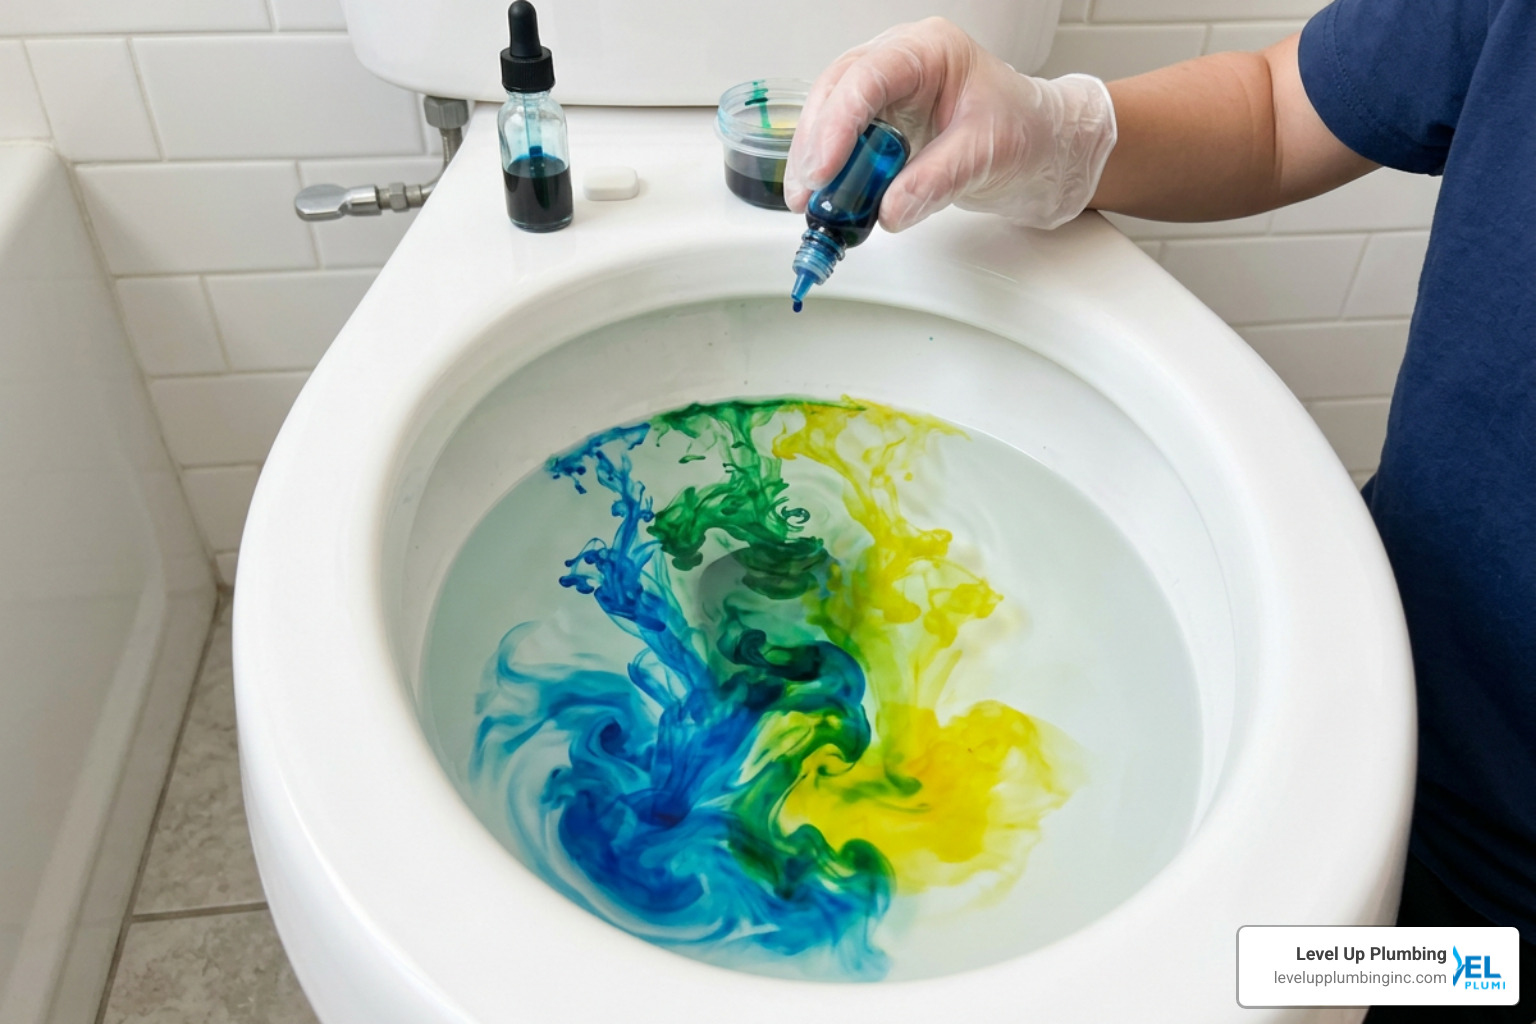
Follow these steps to run the test:
- Remove the lid from your toilet tank.
- Add 10 to 15 drops of dark food coloring (blue, red, or green work best) directly into the tank water. Do not flush the toilet.
- Wait 20 to 30 minutes.
- Check the toilet bowl. If you see colored water swirling in the bowl, you have a confirmed leak. Water is bypassing your flush valve seal, and it is time for a flush seal replacement.
Step-by-Step Guide to Replacing Your Toilet Flush Valve Seal
Before starting any plumbing project, it is essential to prepare your workspace. Having the right tools and knowing how to safely handle your fixtures will prevent accidental water damage or cracked ceramic. If you want to prepare thoroughly, read our guide on How to Start Toilet Repair in Orange County CA.
Tools and Materials Needed
To replace your flush valve seal, gather the following basic tools:
- A replacement flush valve seal (matched to your toilet brand and model)
- A sponge and a small bucket (to remove leftover water)
- Old towels or rags (to catch drips)
- An adjustable wrench (usually only needed if you must adjust or remove tank hardware, though most seal replacements require no tools at all)
- A pair of disposable gloves
Step-by-Step Flush Seal Replacement Instructions
Once you have your replacement part ready, follow these detailed steps to complete the installation.
Step 1: Shut Off the Water Supply
Locate the metal shut-off valve on the wall behind or beneath your toilet. Turn the handle clockwise until it stops. This cuts off the water supply to the fill valve so the tank won’t refill while you work.
Step 2: Drain the Toilet Tank
Flush the toilet and hold the handle down until as much water as possible exits the tank into the bowl.
Step 3: Sponge Out the Remaining Water
There will still be about an inch of water left at the bottom of the tank. Use a large sponge to soak up this remaining water, squeezing it out into a nearby bucket or the toilet bowl. The cleaner and drier the bottom of the tank is, the easier it will be to install the new seal.
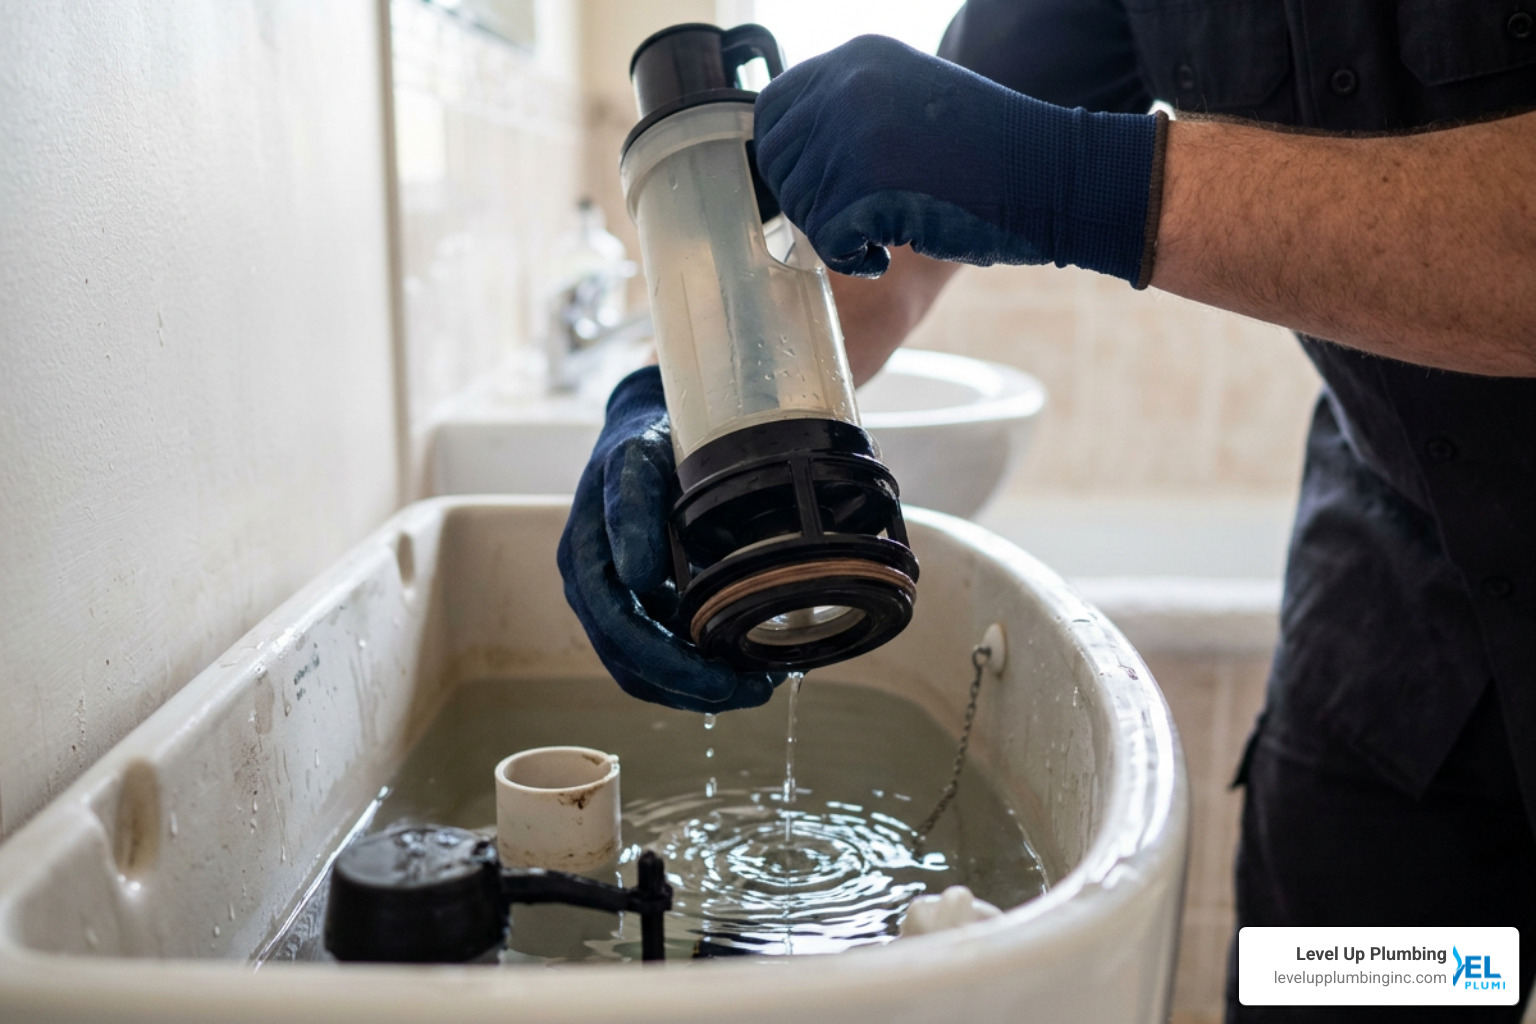
Step 4: Remove the Flush Canister or Flapper
Depending on your toilet design, you will have either a traditional flapper or a modern canister tower.
- For Flappers: Unclip the flapper’s ears from the pegs on the overflow tube, disconnect the lift chain from the handle arm, and lift the flapper out.
- For Canister Valves: Grab the center tower, twist it counterclockwise (usually about a quarter-turn), and lift the entire canister assembly straight up out of the tank. If you have a specialty single-flush toilet, you might use a high-quality aftermarket seal like the Niagara Stealth Power Flush Replacement Seal | Fluidmaster which features an upgraded symmetrical design for a more secure, leak-free fit.
Step 5: Remove the Old Seal
Peel the old, worn rubber seal off the base of the canister or flapper. Take note of how it was positioned so you can install the new one in the exact same orientation.
Step 6: Clean the Valve Seat
Use a damp rag or sponge to wipe down the plastic valve seat at the bottom of the tank. Remove any accumulated slime, mineral crust, or debris. If the seat is rough, the new seal won’t make a watertight connection.
Step 7: Install the New Seal
Stretch the new seal over the bottom ridge of the canister or flapper. Ensure that it sits flat in the designated groove without any twists, bumps, or folds.
Step 8: Reassemble and Test
Lower the canister back into the tank and twist it clockwise to lock it back into place, or clip your flapper back onto the overflow tube. Reconnect the lift chain, ensuring there is just a little bit of slack when the flapper or canister is completely closed.
Turn the water supply valve back on, let the tank fill completely, and perform a few test flushes to verify that everything is operating smoothly and that the trickling has stopped.
Choosing the Right Seal and Avoiding Common DIY Mistakes
With so many toilet brands on the market, choosing the correct replacement seal can feel overwhelming. If you buy a seal that is even a fraction of an inch off, your toilet will continue to leak.
When browsing options on Lowe’s Flush Valve Seals, you will notice two primary materials: rubber and silicone.
Silicone vs. Rubber Flush Seals
| Feature | Rubber Seals (e.g., Standard OEM) | Silicone Seals (Premium Aftermarket) |
|---|---|---|
| Average Lifespan | 2 to 3 Years | 4 to 8 Years |
| Chlorine Resistance | Moderate (can degrade quickly) | High (highly resistant to chemicals) |
| Hard Water Resistance | Fair (prone to mineral scaling) | Excellent (repels calcium/magnesium) |
| Flexibility | Decreases over time as rubber hardens | Retains elasticity for years |
| Warranty | Typically 1 Year | Often 5+ Years |
If you have a dual-flush toilet, look for specialized options like the Dual Flush Valve Seal D – Korky, which is constructed from chemical-resistant red rubber designed to withstand harsh municipal water.
Common Mistakes to Avoid
Even a straightforward DIY project can go awry if you overlook small details. Keep these common mistakes in mind:
- Using the Wrong Dimensions: Never guess the size of your seal. Some toilets use 2-inch valves, while newer high-efficiency models use 3-inch or 3.5-inch valves. Always measure your old seal’s outer diameter (OD), inner diameter (ID), and lip thickness. For example, a standard small-scale toilet might require a precise Toilet Flush Valve Seal (1-7/8-inch OD And 15/16-inch ID, 1-5/16-inch Lip Or 47mm OD 24mm ID 34mm Lip) (3 Pack) – NuFlush, while a larger Kohler model might need a Silicone Seal For Flush Valve (66mm OD, 36mm ID, 51mm Lip) (2-5/8-inch OD, 1-7/16-inch ID, With 2-inch Lip) – NuFlush. If you have an American Standard Champion 4, you will need a massive NuFlush, Champion 4 Silicone Flapper Seal For 3.5 Inch Upgrade By NuFlush (89mm OD 52mm ID, 55mm Lip) – NuFlush. Double-lipped options like the Flush Valve Seal With Double Lip (64mm OD 29mm ID 40mm Inside Lip 49mm Lip Or 2-1/2 OD, 1-1/8-in ID, 1-9/16 Mm Lip, 1-15/16-in Lip) (2 Pack) – NuFlush provide an extra layer of protection for standard gravity-flush toilets.
- Overtightening Tank Bolts: If you must remove the tank to replace a full flush valve assembly, be incredibly careful when putting it back together. Overtightening the metal bolts against the ceramic toilet can easily crack the tank, turning a $10 repair into a brand-new toilet replacement.
- Leaving Too Much or Too Little Chain Slack: If the lift chain connecting the toilet handle to the flapper or canister is too tight, it will hold the seal slightly open, causing a constant leak. If it is too loose, the chain can get caught underneath the seal as it closes, preventing a proper seal.
- Relying on Chemical In-Tank Cleaners: Avoid drop-in chlorine tablets. They will quickly eat away at your brand-new seal, ruining your hard work in a matter of months.
Frequently Asked Questions about Toilet Seals
Can I replace the flush valve seal without removing the tank?
Yes, in the vast majority of cases! If you are simply replacing the elastomeric or rubber flush valve seal on a canister-style or flapper-style toilet, you do not need to separate the tank from the bowl. You can easily access the seal by removing the tank lid, draining the water, and unclipping or twisting out the center canister or flapper.
You only need to remove the tank if you are replacing the entire flush valve plastic housing, which requires replacing the large foam tank-to-bowl gasket underneath the tank.
How often should a flush valve seal be replaced?
Standard rubber seals should be replaced every 2 to 3 years as part of regular home maintenance. However, if you upgrade to a high-density silicone seal, you can expect it to last anywhere from 4 to 8 years because silicone is far more resistant to hard water mineral deposits and chlorine.
What should I do if the toilet still leaks after replacing the seal?
If you have installed a brand-new seal and the toilet is still running or leaking, check the following:
- Inspect the Flush Valve Seat: Run your finger along the plastic seat at the bottom of the tank. If you feel any rough mineral buildup or chips, the seal won’t sit flush. Clean it gently with a non-scratch sponge and vinegar.
- Adjust the Chain Tension: Make sure the lift chain is not too tight or tangled.
- Check the Fill Valve Water Level: If the water level in your tank is adjusted too high, water will constantly spill over the top of the overflow tube, mimicking a flush seal leak. Adjust the float adjustment screw on your fill valve to lower the water level to about an inch below the top of the overflow tube.
Conclusion
A running toilet is more than just an annoying background noise — it is a major waste of water and a direct hit to your monthly utility bills. Fortunately, with the right steps and a little patience, a flush seal replacement is a highly manageable DIY project that can restore your toilet’s efficiency in no time.
However, if you have tried replacing the seal and your toilet is still running, or if you suspect there is a deeper issue with your home’s water pressure or drain lines, don’t hesitate to seek professional help.
At Level Up Plumbing, we are proud to be a woman-owned plumbing company serving Orange County, CA, including Huntington Beach, Cypress, and Garden Grove. With over 21 years of local expertise and award-winning customer service, we handle everything from minor toilet repairs to comprehensive drain maintenance.
If you want to keep your entire plumbing system in peak condition, consider checking out our helpful guides on What is a Cleanout or read our Drain Preventative Maintenance Tips to Keep Your Plumbing Running Smoothly.
Ready to hand the job over to the experts? Schedule a professional toilet repair in Huntington Beach with Level Up Plumbing today, and let us take care of the hard work for you!